I hope everyone had a wonderful Christmas and New Year. Can you believe the first week of the new year is already under our belt? I felt bored yesterday, so I decided to go out shopping to see if I could find any bargains..Christmas was 75% off in some places, but I really don’t need any more Christmas stuff. I didn’t use half of my decorations this year. I decided to stop in at JoAnn fabrics to look for a laminator, but do you believe they don’t carry them anymore? While browsing, since I had a 50% off coupon, I came across a packet of stencils with some really cute sayings on them. I keep seeing all these signs in the decorating groups I belong to and they look so nice, but when I inquire on prices, I’m just not willing to pay the price plus shipping charges. I like to see things and touch them, so I know exactly what I’m getting. Does anyone else feel that way?
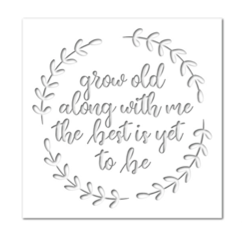
There are 26 different stencils in the packet I purchased. They sell for $16.99, so with my 50% off coupon, that brought the price down to $8.50. CLICK ON STENCIL to be taken to JoAnn website for stencil (no affiliate, just sharing the information).

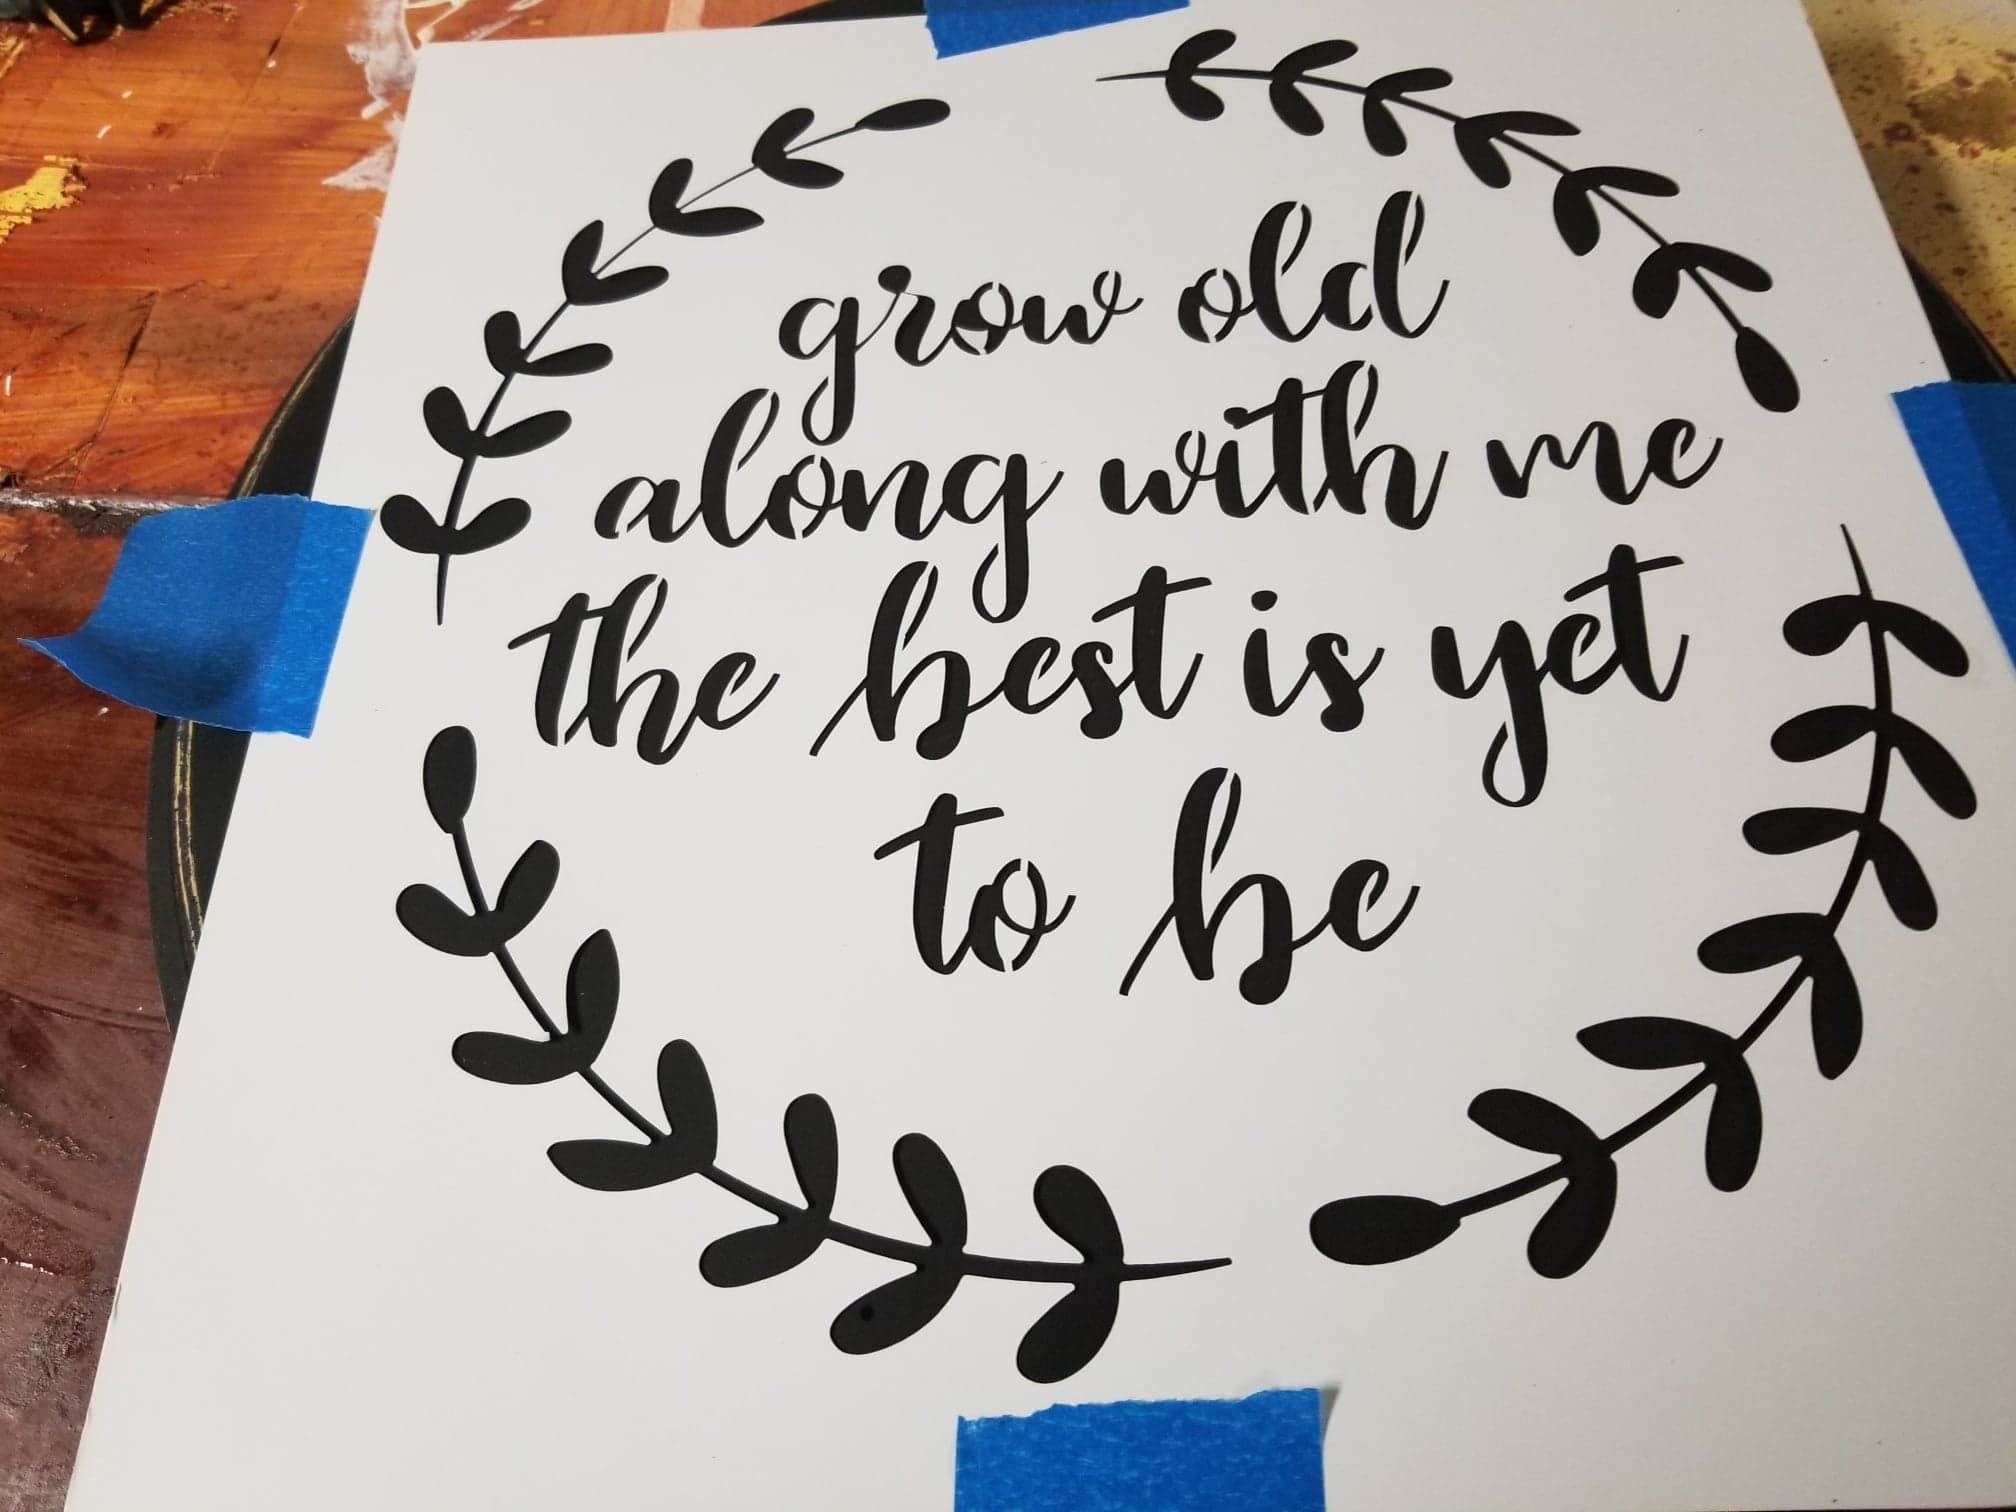
I especially liked this stencil, “grow old along with me, for the best is yet to be.”
Just up the road from JoAnn’s is our local Goodwill. I find lots of good things there and that’s where I decided to go look for something to paint on. As I went down the “wood” aisle, I saw this wood Lazy Susan. The round shape was perfect for this stencil and only $2.99!!
Have you ever wondered why it’s called a Lazy Susan? Me too. After some google searching, this is what I found. “Many authorities recount the theory that the ‘Susan’ was simply a common maid’s name, and that the term ‘Lazy Susan’ applied to this self-service gadget was a sarcastic reference to the supposed sloth of household servants.”
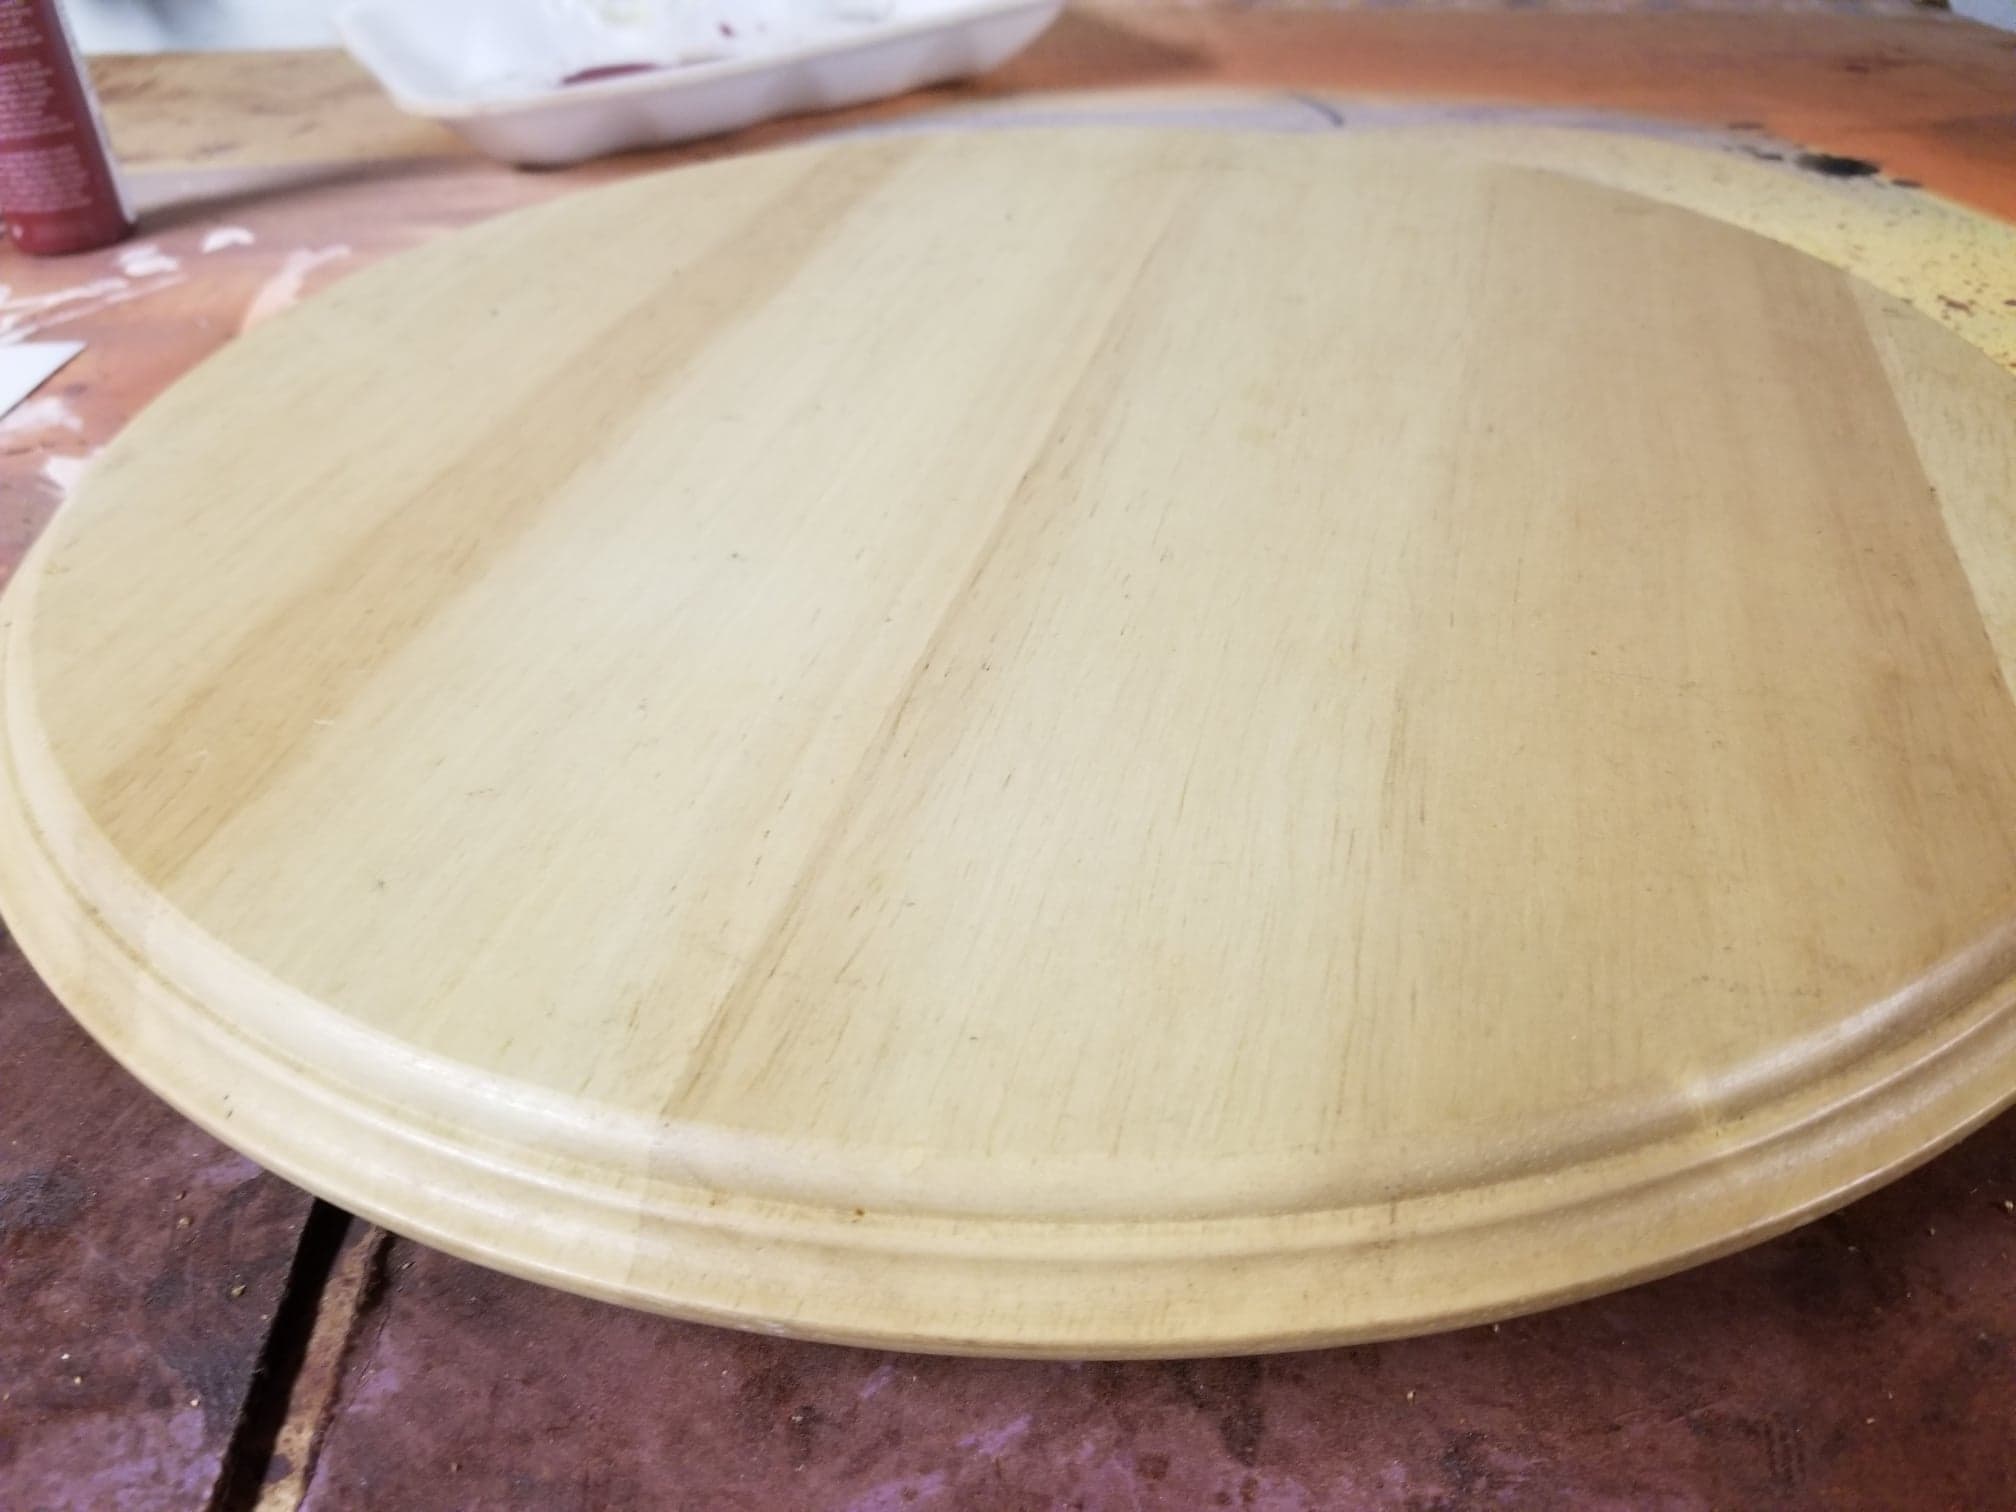
I bought the Lazy Susan, brought it home, sanded it lightly and then painted black with some acrylic, black, craft paint. I used 2 coats of paint. Then took some sand paper and sanded around the edges to give it a distressed look. 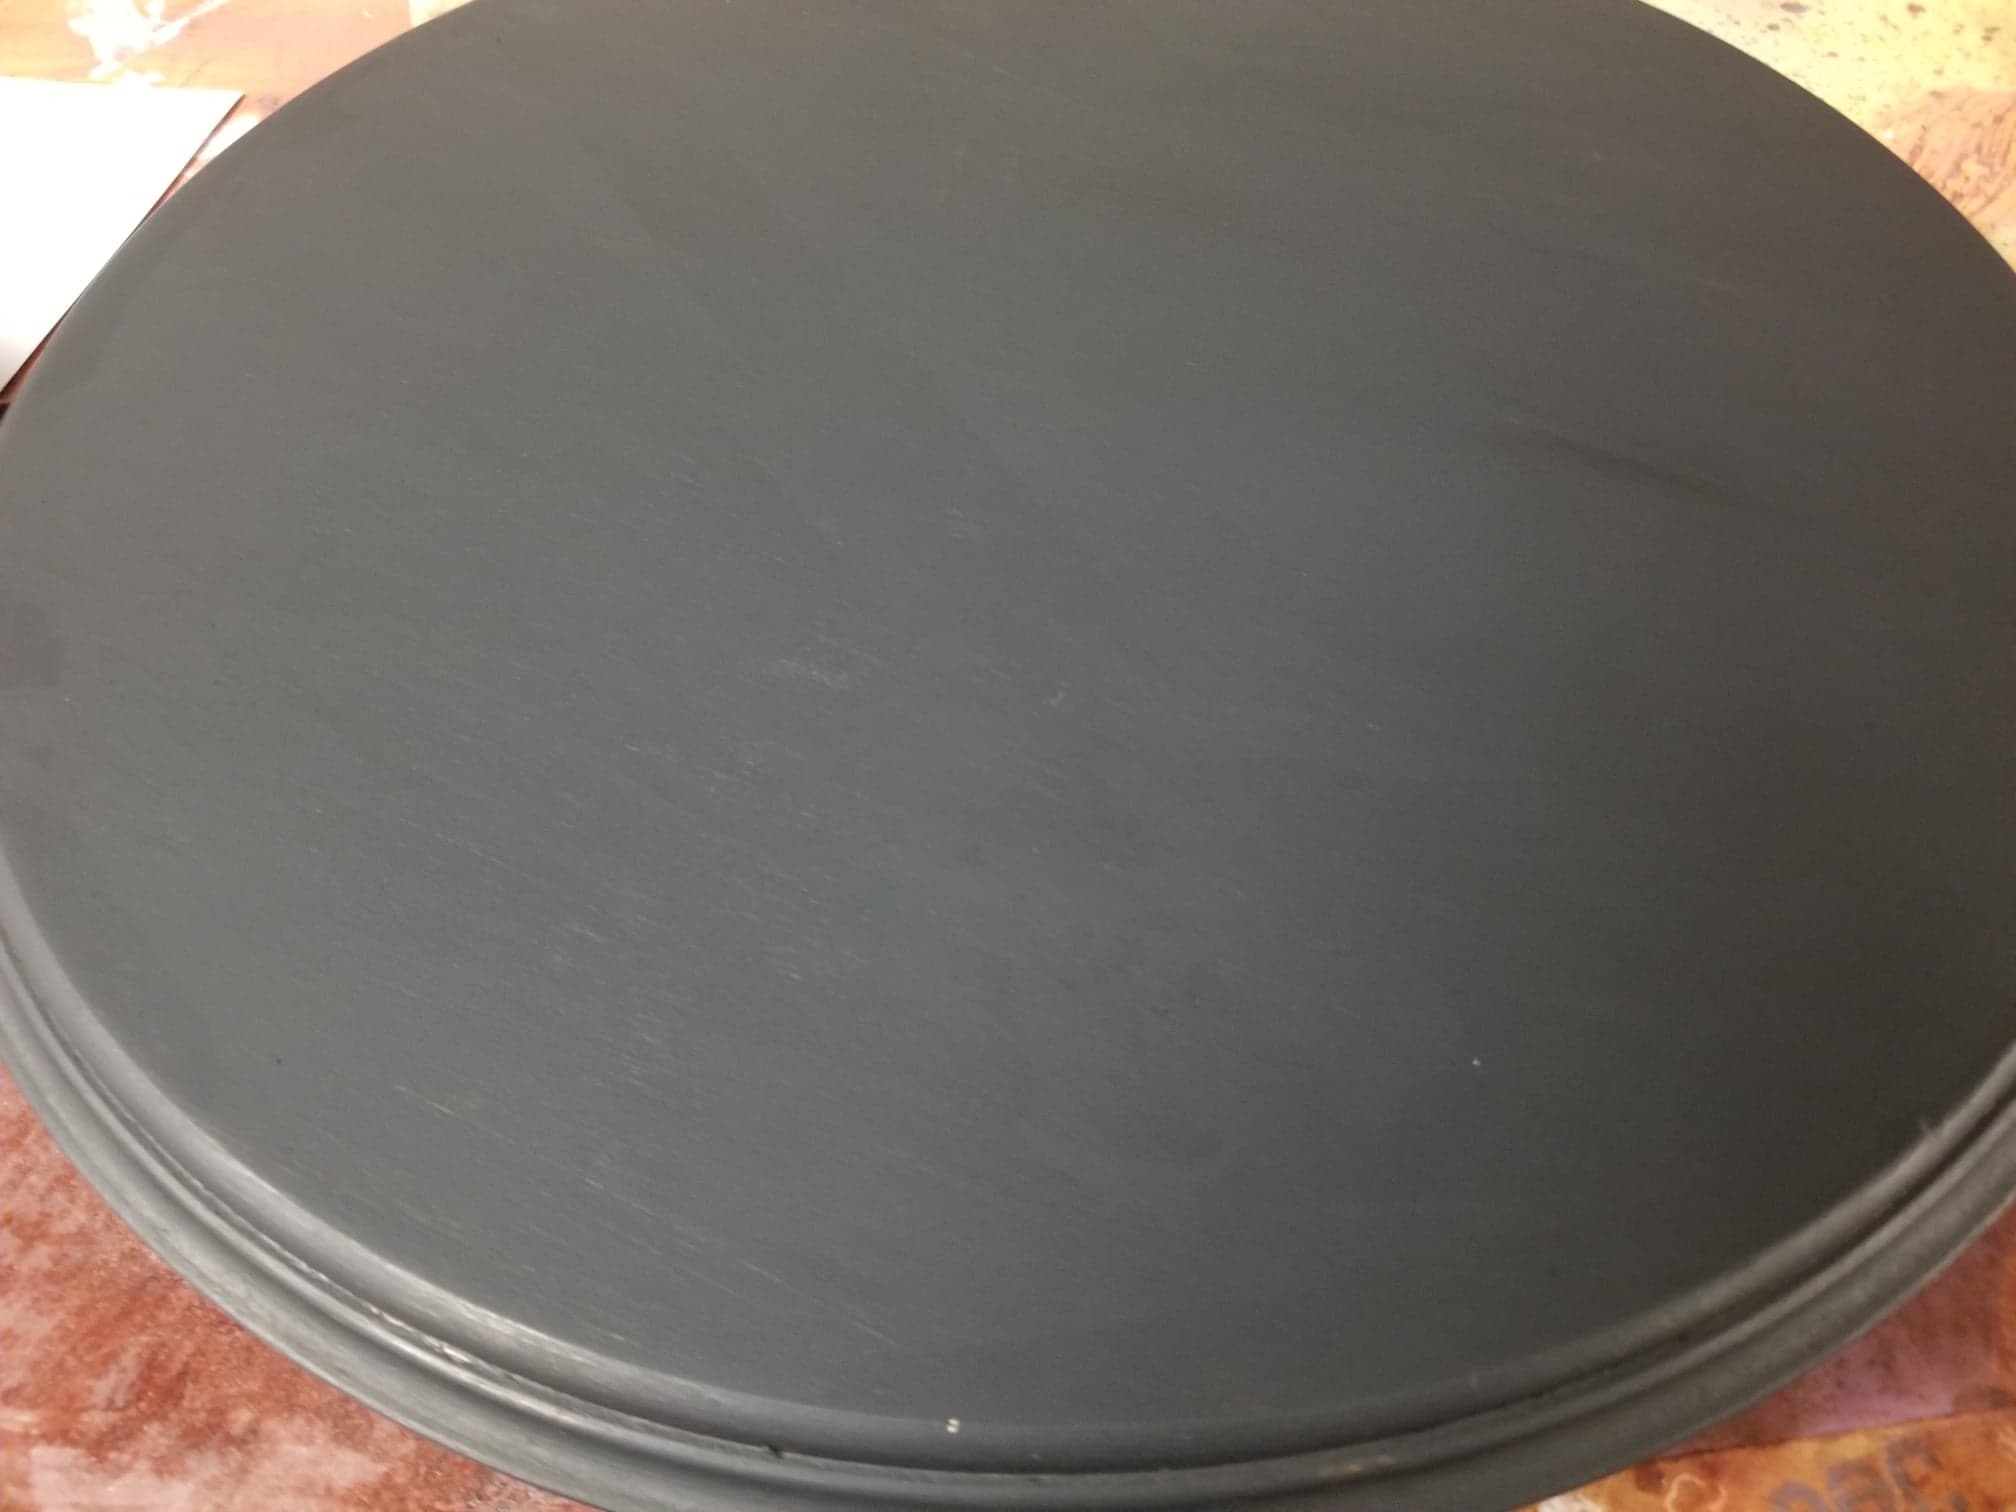
I used a blow dryer to quickly dry the paint and then placed my stencils on top, securing with some blue painters tape.
I chose ivory paint for my stenciling. With the stencil brush, that you have dipped into the paint and then pounced on a paper towel to get it dry, began to stencil the design. A stencil brush has short, stiff bristles and it’s important to unload some of the paint so it doesn’t run or bleed under the stencil. In other words, the brush will almost be dry, but just have enough paint to color the design. Do a combination of dab and brush strokes.

This is what the design looks like after you remove the stencil.
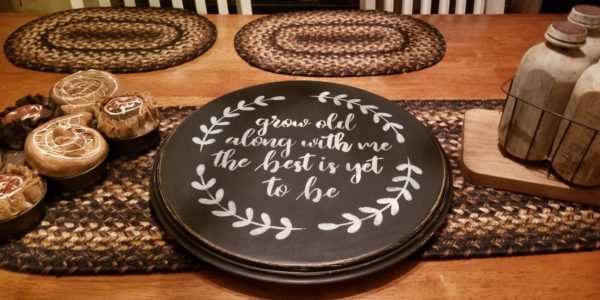
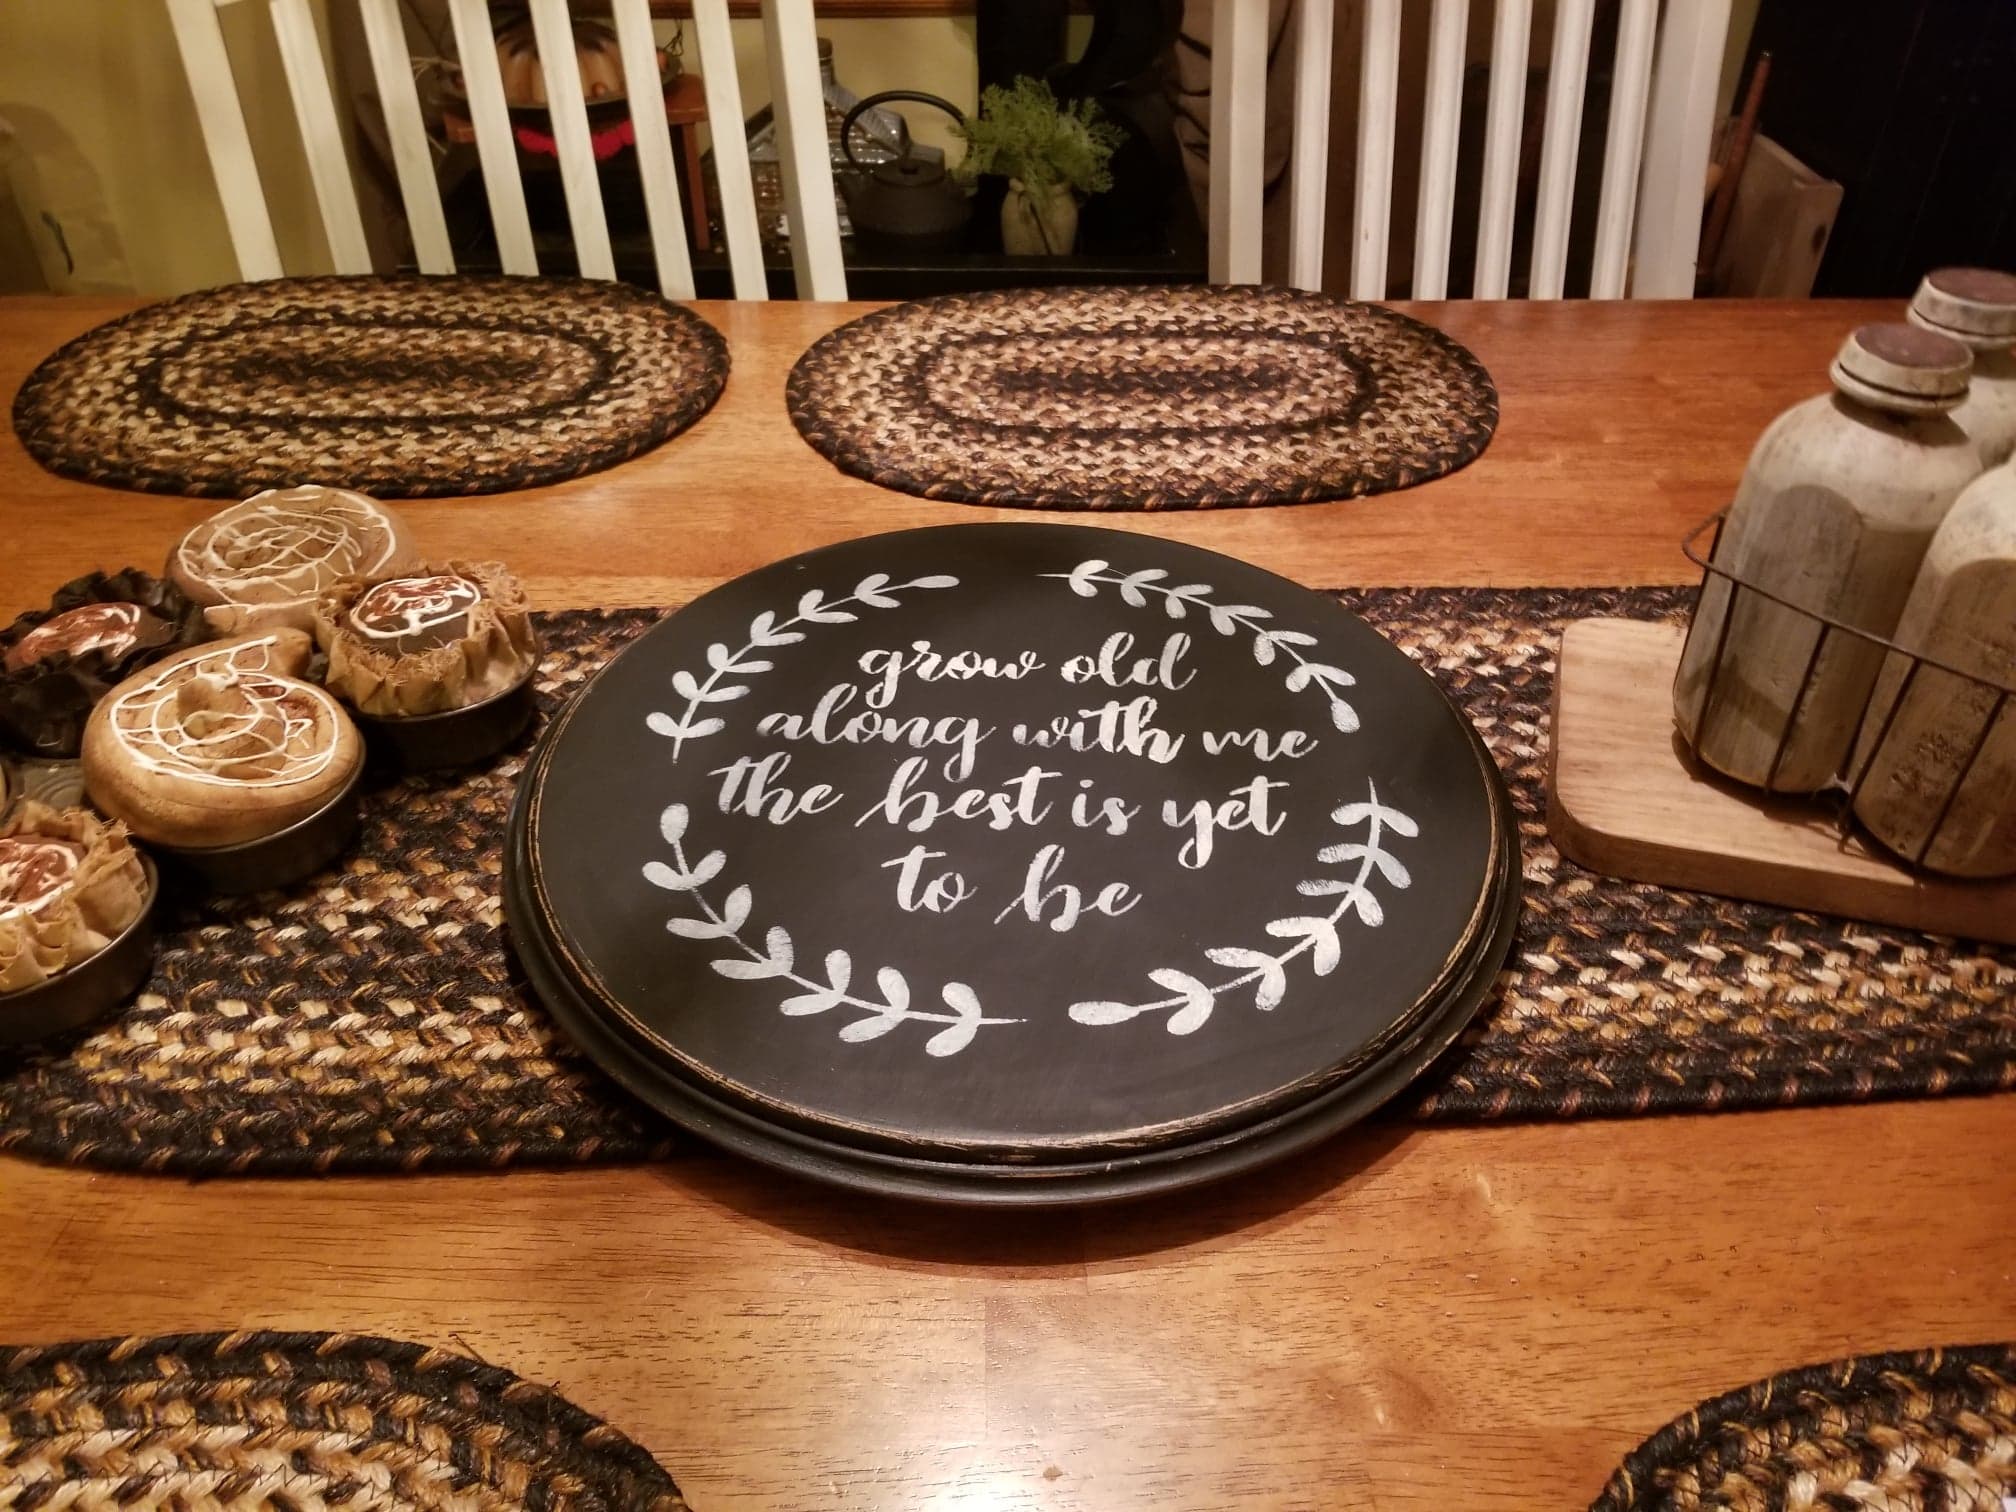
 I love how it turned out. After it cures for a few days, I’m going to put some clear wax on it just to help seal the design. You don’t need to do this, but if you plan on setting anything on it, it will definitely help keep the paint from getting scratched off. I like to use the Johnson’s Paste Wax, you could also use Antiquing Wax if you want to tone done the color.
Here’s a picture of it on my dining room table.
 I can’t wait to try some of the other stencils…I just need to find the right piece of wood! Stay tuned!
FOLLOW ME ON SOCIAL MEDIA
TTT INSTANT POT TIPS AND RECIPES
Thanks for visiting today, while you are here take a look at my other posts!

